Road Network
You must have installed the RoadNetwork, Entity and Quest Extensions before starting this tutorial.
Also, make sure you have read the layout documentation and created a static page.
Road Networks are essential if you want to make NPCs move around your map or let the player follow a path. In this guide, we will show you how to create a road network and how to use it in your story.
What is the road network
The road network is an internal graph structure that Typewriter uses to efficiently calculate paths between two distant points.
Creating a road network
First, we need to add a Base Road Network entry to our page. To add it to our page, click on the + icon in the top right corner of the panel and search for base road network then add it to your page by clicking on the + icon.
Opening the content mode
In the Base Road Network entry in the inspector, click the icon next to the ArtifactId field to open the content mode.
Adding a node
Now that we have opened the content mode, we need to add a node. Nodes are points in a world that can be connected to each other using edges. To add a node, in your hotbar select the diamond and right-click it. This will open the node editor. To exit the menu of the node, click the end crystal.
Creating the path
To create a path, you will always need 2 nodes. So create 2 nodes and then select the redstone from your hotbar and right-click it. Now it should look a bit like this:
Now you have created a path. You can expand a road network with unlimited nodes and create paths between them.
It is recommended that you create nodes at the beginning and end of a road or path in your world. This is to save resources on loading and recalculating the edges.
Editing a node
When in the node editor, you have 4 options:
- Change Radius
- Remove Edge
- Add Fast Travel Connection
- Remove Node
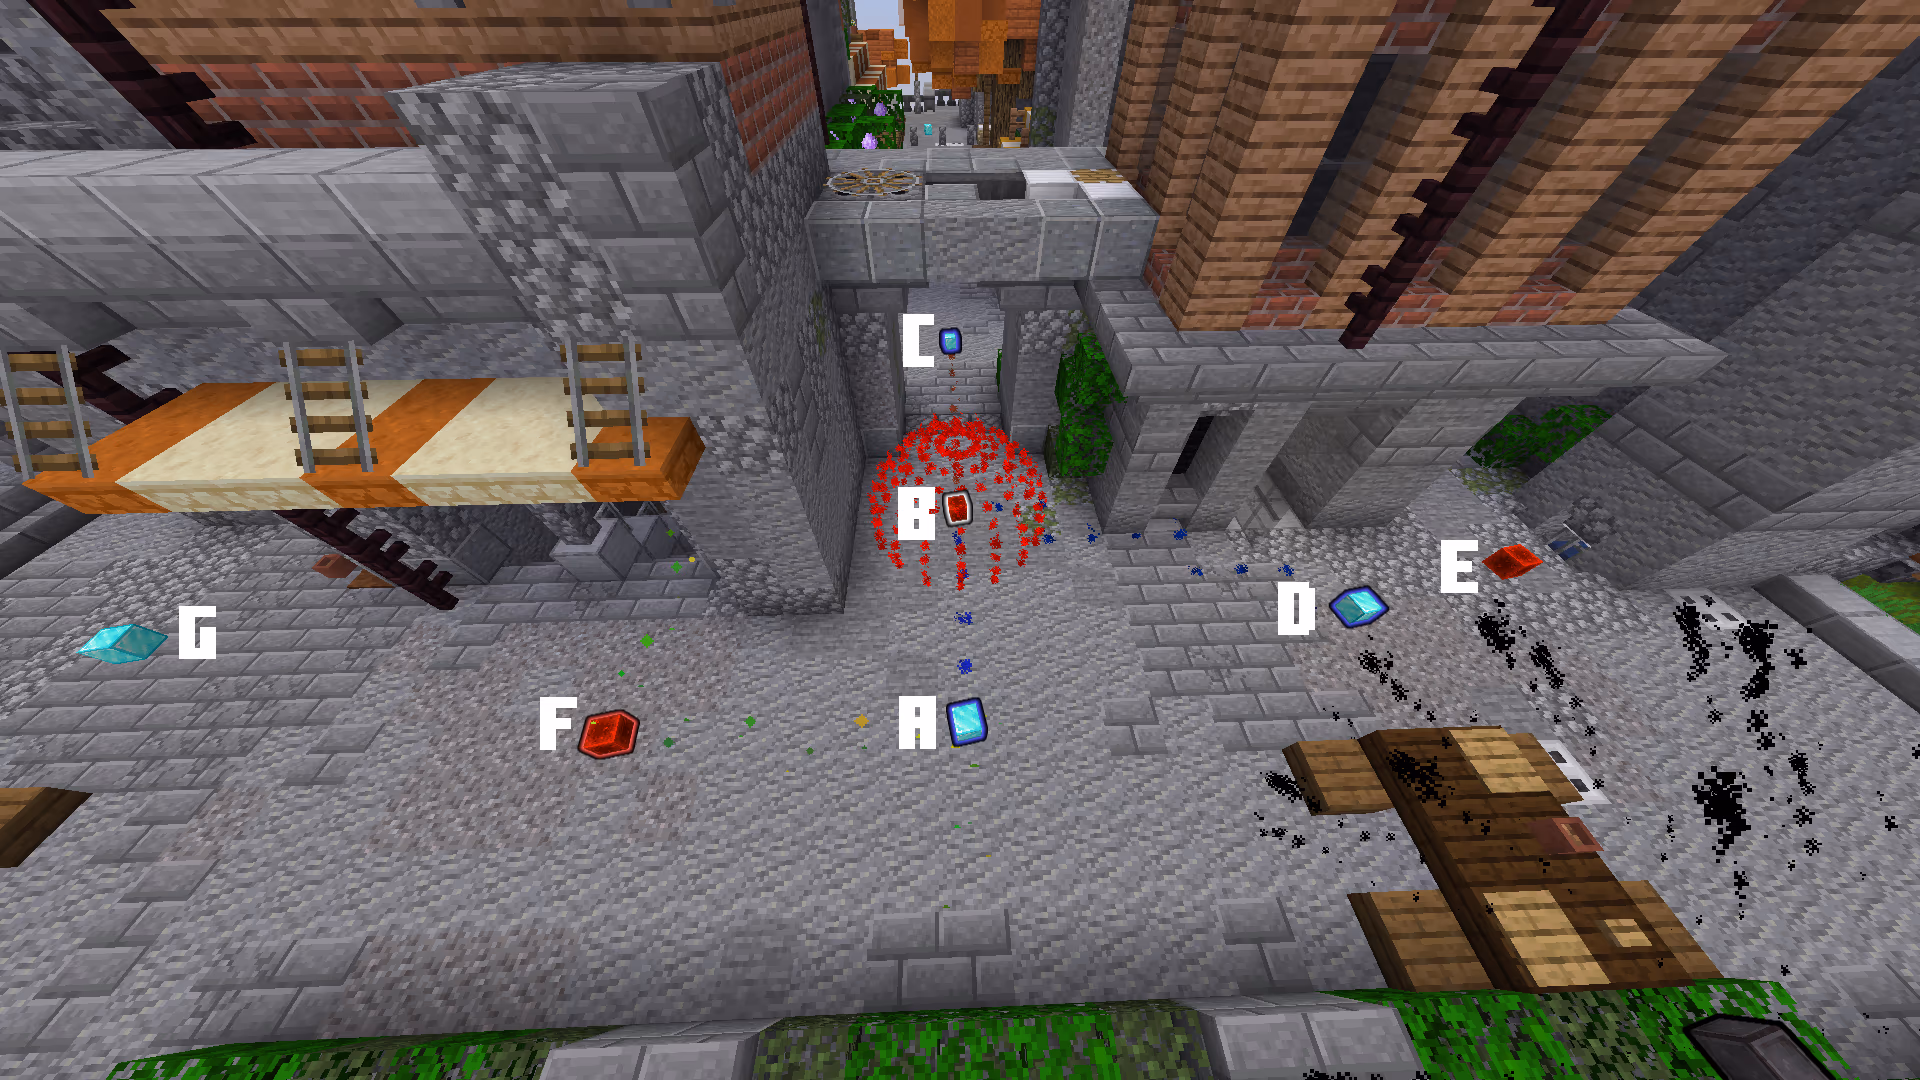
Why is their radius?
When performing pathfinding from node A, all nodes within a 30-block radius will be checked, for example, nodes B, C, D, E, F, and G. If it finds that the path to node C requires passing through nodes B radius, it will stop calculating the path to C. This is because the pathfinding avoids paths that need to skip nodes like B.
How to use?
To change the radius of a node, select the sculk sensor from your hotbar and right-click.
When right-clicking an item, you must not point your cursor at the node you are editing. This will open the content mode and not trigger the event.
Then, with your scroll wheel, you can change the radius of a node.
Why remove an edge?
Removing an edge can be useful when you want a path to skip a node or to make a path one-way only.
How to use?
To remove an edge, select the redstone from your hotbar and right-click it on the node you want to remove the edge from.
You must recalculate the edges using the redstone from your hotbar after adding or removing a negative node
One way path
To make it one way only, you should, instead of just right-clicking, also hold shift. This will make the edge one-way only.
Why add a fast travel connection?
Fast travel connections are used to make a path teleport the NPC to another node instead of needing to walk to it.
How to use?
To add a fast travel connection, select the emerald from your hotbar and right-click it on the node you want it to teleport to.
One way fast travel
To make it one way only, you should, instead of just right-clicking, also hold shift. This will make the fast travel one-way only.
To remove a node, select the redstone block from your hotbar and right-click it.
When right-clicking an item, you must not point your cursor at the node you are editing. This will open the content mode and not trigger the event.
Negative Nodes
Sometimes you want pathfinding to not go via a certain path. For example, when you have a place where the pathfinding thinks it can jump down or up 1 block but shouldn't, you can add a negative node to prevent this.
Here is an example:
- With Negative Node
- Without Negative Node
How to add a negative node?
You can add a negative node by selecting the netherite ingot from your hotbar in the content mode and right-clicking it.
You must recalculate the edges using the redstone from your hotbar after adding or removing a negative node
Highlighting nodes
When you have a lot of nodes, it can be hard to see which nodes are connected to each other. To make this easier, you can highlight the nodes that are connected to each other. To do this, select the glowstone from your hotbar and right-click it.
Ending
Now you have learned how to successfully set up the road network.